 千冶・刃
千冶・刃 姫子・旅立ち
 遠坂凛
遠坂凛 ギルガメッシュ
 キュレネ
キュレネ ファイノン
ファイノン ホタル
ホタル フォフォ
フォフォ ゼーレ
ゼーレ ヴェルト
ヴェルト 花火
花火 ブラスワ
ブラスワ 銀狼
銀狼 刃
刃 カフカ
カフカ 鏡流
鏡流


崩壊スターレイル(スタレ)における宝箱の場所をまとめています。宝箱を回収する際にお役立てください。
宇宙ステーション「ヘルタ」の宝箱の場所
| ▼ベース部分 | ▼収容部分 | ▼サポート部分 |
| ▼封鎖部分 |
◤崩壊:スターレイル マップ - HoYoLab より引用しています。
ベース部分

収容部分
1F

2F

サポート部分
1F

2F

封鎖部分
2F

3F

ヤリーロⅥの宝箱の場所
| ▼行政区 | ▼郊外雪原 | ▼外縁通路 |
| ▼シルバーメイン禁区 | ▼残響回廊 | ▼常冬峰 |
| ▼ボルダータウン | ▼大鉱区 | ▼リベットタウン |
| ▼機械集落 | ▼造物の柱 | ▼旧武器実験場 |
◤崩壊:スターレイル マップ - HoYoLab より引用しています。
行政区
B1F

1F

郊外雪原

外縁通路

シルバーメイン禁区

残響回廊

常冬峰

ボルダータウン

大鉱区

リベットタウン
1F

機械集落
1F

2F

造物の柱

旧武器実験場
1F

2F

仙舟「羅浮」の宝箱の場所
| ▼星槎海中枢 | ▼流雲渡し | ▼廻星港 |
| ▼長楽天 | ▼金人巷 | ▼太卜司 |
| ▼工造司 | ▼綏園 | ▼丹鼎司 |
| ▼鱗淵境 | ▼幽囚獄 | ▼競鋒艦 |
◤崩壊:スターレイル マップ - HoYoLab より引用しています。
星槎海中枢

流雲渡し
1F

2F

廻星港

長楽天

金人巷

太卜司
1F

2F

工造司

綏園

丹鼎司
1F

2F

鱗淵境

幽囚獄
1F

B1F

B2F

※B2Fの宝箱は機巧鳥を使って回収することになります。
B2Fのギミック

B2Fは上図のギミックを操作することでマップが変化します。上のマップに記載されている色に合わせてから回収に向かいましょう。
B3F

B4F


競鋒艦
1F

2F

3F

ピノコニーの宝箱の場所
| ▼ホテル・レバリー - 現実 | ▼黄金の刻 | ▼ドリームボーダー |
| ▼稚児の夢 | ▼ホテル・レバリー - 夢境 | ▼朝露の館 |
| ▼クラークフィルムランド | ▼ドリームリーフ | ▼熱砂オーディション会場 |
| ▼ピノコニー大劇場 | ▼暉長石号 | ▼ピノコニー折り紙大学 |
◤崩壊:スターレイル マップ - HoYoLab より引用しています。
ホテル・レバリー - 現実
1F

2F

3F

黄金の刻
1F

2F

3F

ドリームボーダー

稚児の夢
全体マップ

立体マップ(小)


立体マップ(大)


ホテル・レバリー - 夢境
1F

立体マップ①
冒険クエスト「屠畜場」で探索するマップになっているため、宝箱探索の際は下記リンクを参照。
立体マップ②

このマップ上の宝箱はハヌに変身する必要がある。詳細は折り紙の小鳥記事を参考にしてほしい。


2F

3F

立体マップ①


夢泡チャージが3つ必要なので、先に①のドリームウォークを使いチャージしてから、②、③、④のドリームウォークを渡る必要がある。
立体マップ②


立体マップ③


朝露の館
1F

2F

※立体マップ②は冒険クエスト「アウトソーサー」で解放可能
立体マップ①


立体マップ②


立体マップ③


箱庭都市

クラークフィルムランド
1F

2F

ドリームリーフ
1F

2F

熱砂オーディション会場
メインエリア

分岐1右側

分岐1左側

分岐2右側

分岐2左側(B2F~2F)


| 閉ざされた部屋への入り方 | |
| 1 |  |
| 2 |  |
| 3 |  |
| 4 |  |


| 閉ざされた部屋への入り方 | |
| 1 |  |
| 2 |  |
| 3 |  |
| 4 |  |
| 5 |  |
| 6 |  |
| 7 |  |
| 8 |  |
分岐3右側

分岐3左側

ピノコニー大劇場
メイン

夢境(3F、2F)


立体マップ①


立体マップ②


立体マップ③

暉長石号
B1F

1F

2F

ピノコニー折り紙大学
メインマップ

学長室

オンパロスの宝箱の場所
| 黎明 | |
| ▼「永遠の聖都」オクヘイマ | ▼「血染めの戦端」クレムノス |
| ▼「神託の聖地」ヤヌサポリス | |
| 永夜 | |
| ▼「紛争の爪痕」クレムノス | ▼「運命の深淵」ヤヌサポリス |
| ▼「囁きの密林」神悟の樹庭 | |
| 異地 | |
| ▼創世の渦心 | |
◤崩壊:スターレイル マップ - HoYoLab より引用しています。
「永遠の聖都」オクヘイマ
1F


2F


「血染めの戦端」クレムノス
B1F

左上の立体マップ-黎明

左上の立体マップ-永夜

1F

2F

3F

右下の立体マップ-黎明

右下の立体マップ-永夜

「神託の聖地」ヤヌサポリス
1F

B1F

B2F

B3F

上の立体マップ-黎明

上の立体マップ-永夜

下の立体マップ-黎明

下の立体マップ-永夜

| 下の立体マップ-永夜の真ん中の宝箱の取り方 | |
| 1 |  |
| 2 |  |
| 3 |  |
| 4 |  |
右下の立体マップ-黎明

右下の立体マップ-永夜

「紛争の爪痕」クレムノス
B1F

1F

2F

3F

「運命の深淵」ヤヌサポリス
1F

2F


上の立体マップ-黎明

上の立体マップ-永夜

| 隠し部屋、上層への行き方 | |
| 1 |   |
| 2 |  |
| 3 |  |
| 4 |  |
| 5 |  |
| 6 |  |
| 7 |   |
| 8 |   |
| 9 |  |
| 10 |  |
| 11 |   |
| 12 |  |
| 13 |  |
| 14 |  |
| 15 |  |
下の立体マップ-黎明

下の立体マップ-永夜

右下の立体マップ-永夜

「囁きの密林」神悟の樹庭
1F

2F

4F

B1Fの立体マップ-黎明

| B1Fの立体マップ-黎明の蓮の上の宝箱の取り方 | |
| 1 |  |
| 2 |  |
| 3 | 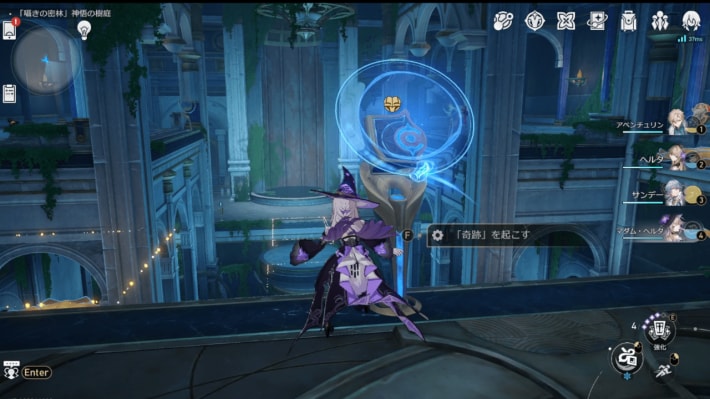 |
| 4 |  |
| B1Fの立体マップ-黎明の水中の宝箱の取り方 | |
| 1 |  |
| 2 |  |
| 3 |  |
| 4 |  |
B1Fの立体マップ-永夜

3Fの立体マップ-黎明

3Fの立体マップ-永夜

創世の渦心

宝箱(戦利品)の種類と獲得物
宝箱には3種類ある

![]()
宝箱(戦利品)には3種類あり、普通、豊富、貴重の順に報酬のグレードが上がっていく。グレードの高い宝箱は、強敵が守っていたりするので簡単に取れないことが多い。
宝箱(戦利品)のグレードと獲得物の例
| 宝箱のグレード | 獲得物の例 |
| 普通の戦利品 |       希少なエーテル×2 信用ポイント×500 希少なエーテル×2 信用ポイント×500 |
| 豊富な戦利品 |     濃縮エーテル×1信用ポイント×2500 濃縮エーテル×1信用ポイント×2500 |
| 貴重な戦利品 |    ★3遺物×2 ★3遺物×2 |
ギミッククリアで出現するものも

![]()
宝箱の中にはギミックを解いたり、クエストをクリアすることで出現するものもある。ひと手間かかる分、宝箱のグレードが高い場合が多いので、面倒くさがらず回収しておこう。
崩壊スターレイルの関連記事
新キャラ一覧
未実装キャラまとめはこちら!星5キャラ一覧
星4キャラ一覧
最強ランキング記事
| 最強関連記事 | |
|---|---|
| 最強キャラランキング |
 全キャラ一覧
 最大ステータス
 ユーザー評価一覧
 担当声優一覧
 ボス・精鋭敵一覧
 愉悦
愉悦
ログインするともっとみられます